This web page guide will inform you on the process of setting up BitLocker encryption on your removable USB storage. University policy now requires all staff and faculty to utilize BitLocker to ensure our campus’ data security. An errant USB drive being left on or off campus unattended can mean vital data could be lost or stolen. With BitLocker on Windows 11 devices, utilizing encrypted drives is a fairly seamless task.
Note: If you have a device larger than 50GB, it may take a considerable amount of time to encrypt. Contact IT if you have this scenario.
Steps To Encrypt
- 1. To Begin, plug in the USB device you would like to use.
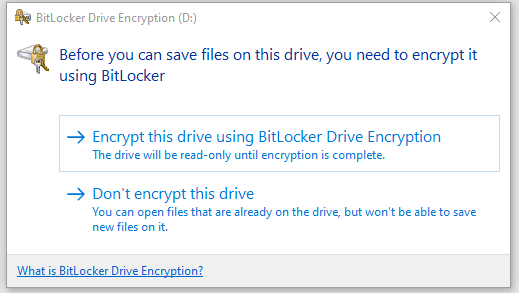
- 2. Once plugged in, a window will appear asking to encrypt the new device. Select Encrypt.
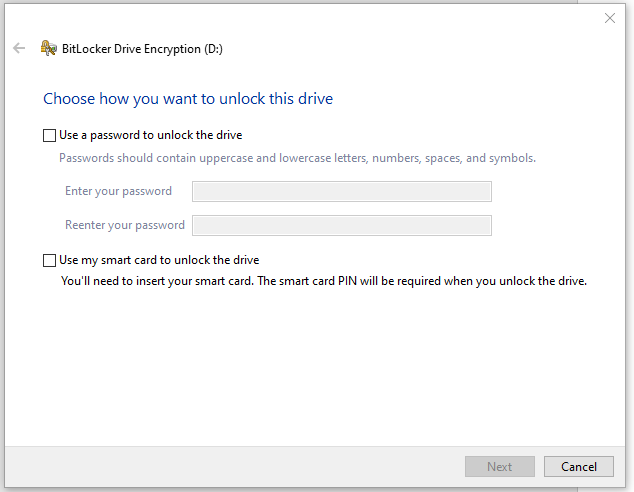
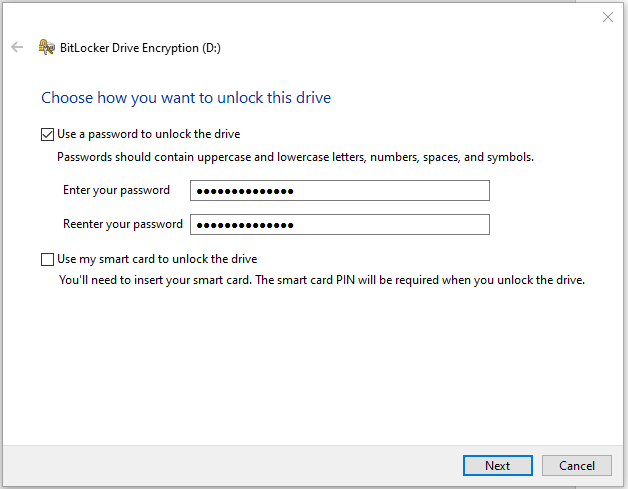
- 3. BitLocker will then ask you for a password for the device. Password security is important, but there is no complexity requirement here. We recommend at least 8 characters.
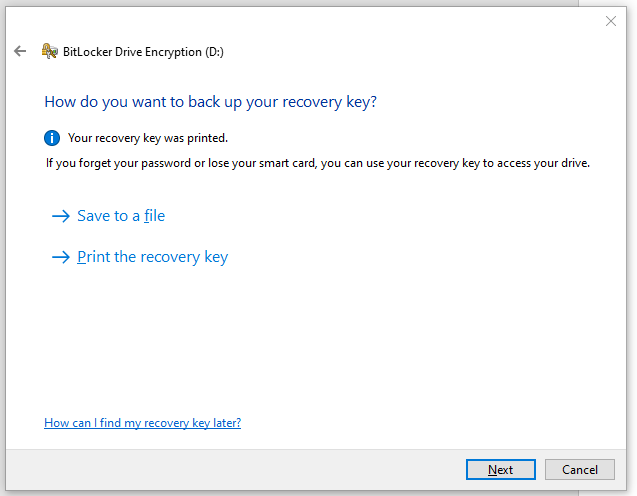
- 4. Once you have created a password, you will need to Save your Recovery Key. The Recovery Key is a vital part of encrypting your drive. Should something ever go wrong, or you forget your password, the Recovery Key is the only way to get back into your device.
With BitLocker on a University provided machine, you are not allowed to simply save the Key to a file. The next few steps will assist in saving this key for Safekeeping.
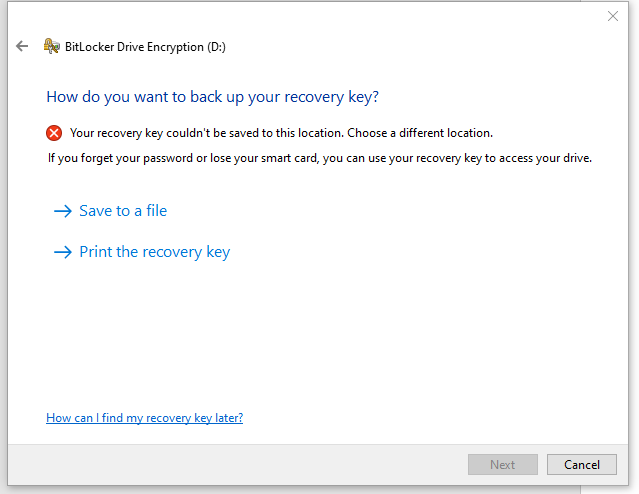
- 5. The way we must save our Recovery Key requires printing it. But we do not want to create a paper copy that can easily be lost. In the print pop up menu that appears after clicking “Print the recovery key” We want to find and select the “Adobe PDF” selection.
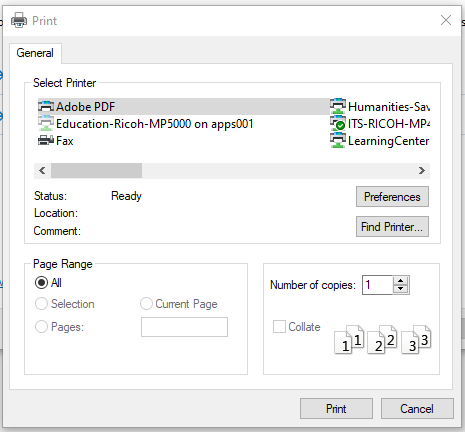
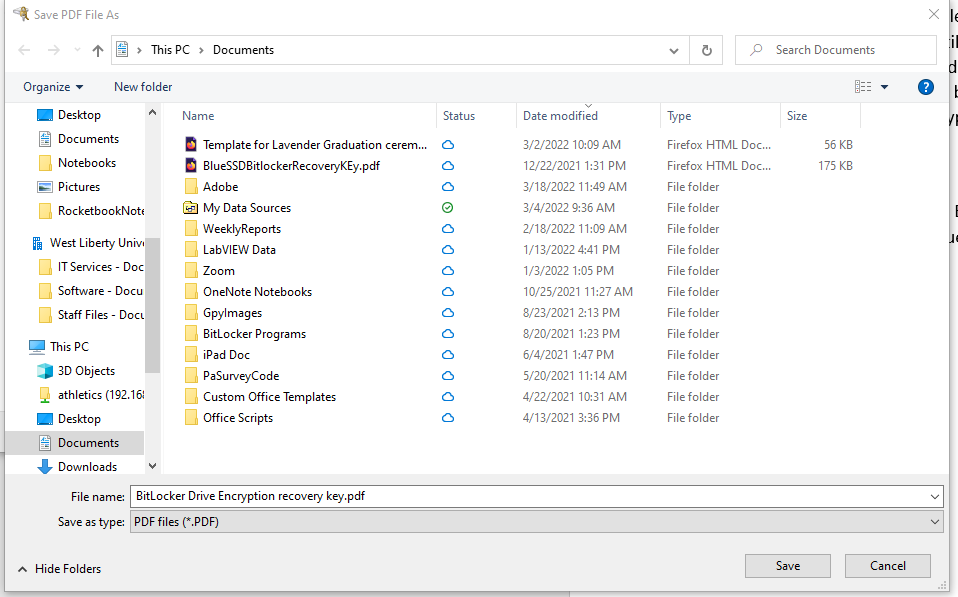
6. After selecting “Adobe PDF” the window will change to a File Explorer window. Select a location to save the recovery key file to and give it a name.
If saved correctly, the file should look something like this:
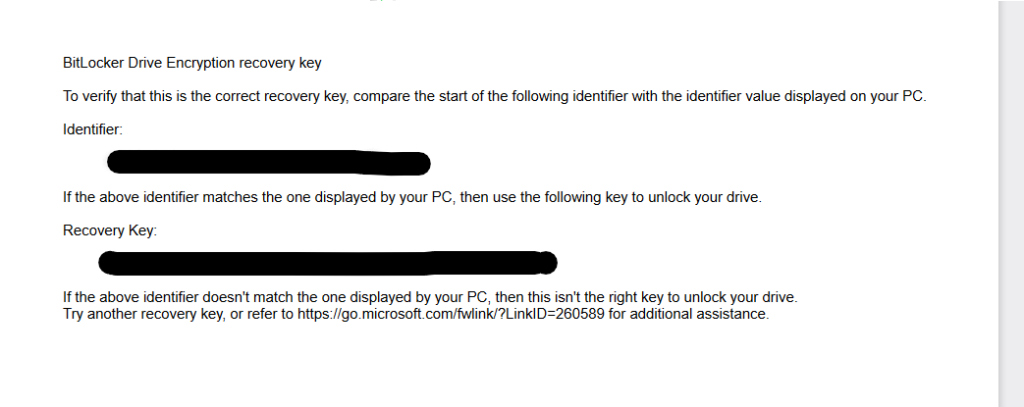
- 7. Once you have saved the Recovery Key we can move on in the process.
We now need to select an encryption type. Select “Compatible Mode”
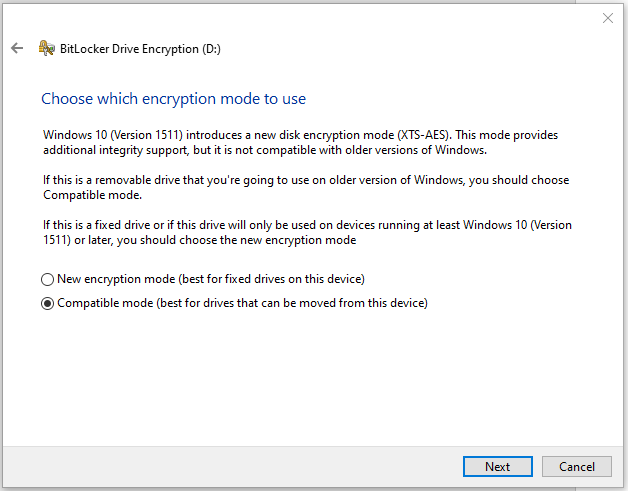
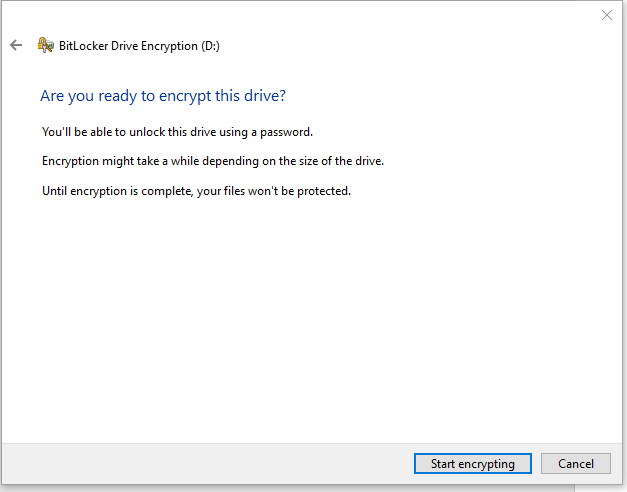
Once Selected you can tell BitLocker to start encrypting.
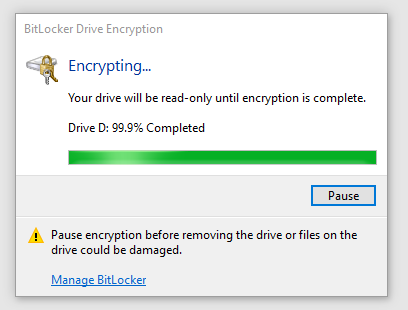
- 8. Once the device has begun encryption do not remove the device, do not shut down your computer. The progress bar may freeze at around 99.9% completion. If this happens, click pause, wait a moment, then click resume. The encryption should only take a few minutes depending on the device.
Note: If you have a device larger than 1TB, it may take a considerable amount of time to encrypt. Contact IT if you have this scenario.
- 9. Once the drive is encrypted it is ready for use! It will appear in your File Explorer with a lock icon, ready to have files dropped on it.

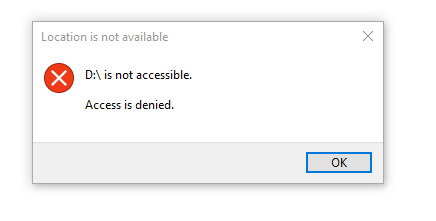
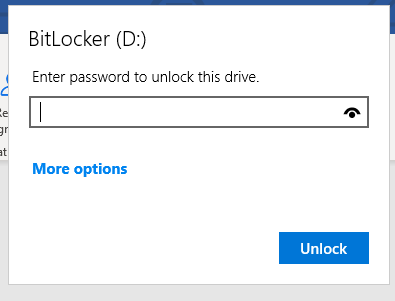
Upon removing and reattaching the encrypted device to your machine, it will throw up an error message saying it is not accessible. This is the encryption at work! To access the drive, you must enter the password into the BitLocker input box that appears in the upper right hand corner of your screen.
If you have any questions do not hesitate to contact IT for assistance.
We can be reached via email at: helpdesk@westliberty.edu or by our ticket system located at: IT Helpdesk